Skip to content

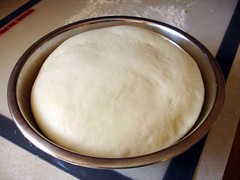
Class: Enriched Doughs at Culinary Communion

13-Sep-2006


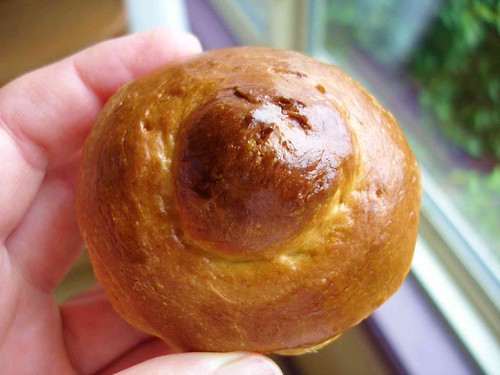
Saturday morning at 10:00 am found me on a quiet street in West Seattle heading toward a house I’d wanted to visit for quite some time.  Well, that’s a little bit untrue as this was not the original location for the cooking school known as Culinary Communion, but it’s close enough to the truth

I entered, was greeted by Chef Gabriel Claycamp, grabbed an apron and made my way upstairs to join a few other students who has arrived before me.  While waiting for the balance of the class to arrive we exchanged light conversation and got to know each other a bit.  I also took the opportunity to glance through the materials provided to each student:  a notebook with background information on the basic concepts for this class and a series of recipe cards that listed all recipes – both for the breads and the lunch items. 
 
Once everyone had arrived, Chef Gabe started out with background information.  This was actually the second in a series of classes.  I was not enrolled in the whole series but had taken advantage of an open spot in this class and jumped in.  So part of the pre-hands-on discussion contrasted what the students had done the prior week with the recipes we would be using this week. 
 
Chef covered the primary ingredients used to tenderize enriched doughs:  butter, oil, eggs, milk and cream.  We learned about the term "shortening" and that although we now think of a specific product called shortening, the actual term comes from the affect that fats have on the gluten threads – they shorten them and tenderize the resulting bread.  After a few more fun and interesting facts it was time for us to get our hands into it all! 
 
I liked the way this class was organized.  As you probably know, making yeast breads takes a certain amount of time as you need to allow the yeast to do its work.  To compact the time needed, a batch of the doughs we would be working with had already been made and were through their first rise.  We would shape them and then allow them to go through the second rising process.  During that time we’d actually go back to the beginning and create the dough from scratch so that we would get experience with all parts of the process just reversed a bit. 


Our first task of the day was to make Brioche à Tête.  Chef Gabe cut the dough into small pieces and then showed us how to roll it into a small ball and then create the distinctive little "head" that we’ve come to expect on our brioche.  We rolled and shaped our way through the batch of dough and then our little tins were set aside to let the dough do it’s final rise.  
  
Next, it was on to shaping Uncle Gerry’s Famous Butter Rolls, White Bread and Cinnamon Rolls (based on the Cinnabon recipe).  We divided up into several groups for these three breads, each requiring slightly different handling. 


Uncle Gerry’s rolls are extra-large sized dinner rolls.  Now, the dough has some butter in it but these rolls elevate the butter factor exponentially!  Once the rolls are shaped they are placed in a pan with filled with melted butter, rolled in the butter and then, when all rolls are in place in the pan, more melted butter is poured over the top!  So forget all the things you might be thinking at the moment and just focus on the fact that once these babies are out of the oven you don’t really need to do anything else to them.  Tender and buttery (obviously) they can be eaten just as they are, although a schmeer of fresh pear butter (that had been cooking down when we arrived) or a berry jam doesn’t hurt at all either. 
  
Another group worked on rolling out and shaping the cinnamon rolls.  In addition, the filling of cinnamon and brown sugar needed to be mixed. Here’s where I learned another lesson – something I’d sort of heard about somewhere in my past but it hadn’t really stuck in my mind.  There is cinnamon and there is cassia, which is a type of cinnamon but not true cinnamon.  Here in the US (and in many other places) both the sticks and ground spice that we buy as cinnamon are actually cassia.  Cassia is much stronger flavored than true cinnamon and therefor less of it is needed when cooking. 

 
Chef Gabe had a bunch of true cinnamon bark that we ground for the rolls.  It was much milder and even a little sweeter in taste than the cassia we all know.  According to some sources, cassia is better for savory dishes and true cinnamon better in sweets.  
  
We also had another little lesson about using dental floss for cutting the rolls.  I’ve seen this technique used in the past but it still makes me laugh just a little.  I don’t know why I find it amusing but I do.  For past projects I’ve used fishing line for cutting through things like cakes and this is the same concept.  The floss or line is very thin and since there is no pressure from a knife it makes a nice clean, uncompressed cut. 


Another group worked on rolling out and shaping the White Bread.  We had this bread with our lunch and it had some real substance to it.  I don’t mean it was heavy, it just had a presence yet was not as dense as say, an Italian country bread.  This was another bread that was beautiful on it’s own – no embellishment needed! 
 
Once all the various doughs had been shaped and set in the warming drawer to rise the groups then set about making each dough from the beginning.  This dough, which would be through its first rise by the end of class would be divided up and given to the students to finish at home.  (I ended up with two of the doughs and now have a gorgeous batch of Uncle Gerry’s rolls in my freezer and have already eaten all the cinnamon rolls!)
 
Once the breads were finished a few people worked on cleaning up some of the dishes (we’d actually been pretty good at doing that right along) and others helped Chef prepare lunch. 
 
Oops!  Before I get to that I should tell you that as the shaped rolls finished their second rise they were baked off and we sampled them throughout the class.  Along with a nice batch of Mimosas.  Now that would have made me happy if I hadn’t been already! 


I’ve neglected to mention Paulette who had been instrumental in having all the dough ready for us on arrival and during class was making a beautiful Gingered Squash Soup to start our lunch.  Chef did a quick citrus cure for some salmon which was then grilled.  A couple people assembled Salad with Pears, Hazelnuts and Bacon (oh yum!) and a couple of us picked fresh tomatoes and basil from the garden and assembled a simple platter topped with olive oil. 
 
Around 1:00 pm we sat down to this beautiful lunch accompanied with the fresh-from-the-oven White Bread.  Lunch was lively and animated with conversation flowing easily.  It was a very fun event. 
 
The folks at Culinary Communion offer all types of classes (single sessions as well as series) on nearly every topic imaginable.  And there is something going on nearly every day of the week.  All of the classes are hands-on and I believe the class limit is normally ten (I’m not 100% sure of that but there were just 9 in this class) so there is plenty of opportunity for everyone to get in and get real experience. 
 
For a full list of classes and to register check out their website
 
To see all of the photos from the class go here.   
 

Margherita Pizza

12-Sep-2006


My tomatoes are in full swing and so I take every opportunity I can think of to use them.  Today for lunch I decided to make a Margherita pizza as I’m also trying to use my basil quickly.  The nights are starting to get cool (below 50°F) and that is trouble for basil plants. 
 
I was inspired by a class I took over the weekend and wanted to make my own dough – something I’ve done a lot in the past but haven’t done lately.  I couldn’t find my old standby recipe and decided to look through some of my newer cookbooks.  I was very disappointed when I couldn’t find a pizza dough recipe from Mario Batali, Giada DeLaurentis or Michael Chiarello!   What are they thinking?  Silly people.  Instead, I used Tyler Florence’s recipe, which you can also find here
 
This was a good recipe with one small exception.  In his cookbook, he says the recipe makes one large (14" – 15") pizza.  I rolled this dough out to 15" and it was thicker than I would have liked.  On the website it says this recipe makes 3 – 12" pizzas and I think that would work much better. 
 
The dough came together very easily and, if you let it rest as instructed, it also rolls out beautifully.  Since I didn’t realize how large this crust would be until I was rolling it out I ended up trying to get it as thin as possible while still making sure it fit on my pizza stone.  I pretty much guessed correctly but I have yet to invest in a peel so getting it on the stone, perfectly centered, was just a bit of a challenge!  In fact, you can see a bit of a "wrinkle" in the photo above. 
 
Once I had the dough rolled out I topped it with a bit of olive oil, chunks of buffalo mozzarella, basil and slices of tomatoes from the garden.  I used both Italian Sweet Basil and Purple Ruffles, a very showy basil.  The tomatoes I used were: Yellow Brandywine – a gigantic, sweet, sweet golden tomato; Oregon Spring – a medium sized red tomato specifically formulated for the shorter growing season here in the Northwest; and San Marzano, the Italian plum tomato used for sauces.  A little salt and pepper finished it off. 
 
I baked it at 475°F for 15 minutes which may have been a couple minutes too long.  The bottom was not burnt but was just a bit too crisp, as were the edges of the pizza.  And the mozzarella was completely melted instead of being a bit lumpy as I like it.  That may have been due to the cheese itself though.  This particular type is so silky, soft and smooth that it would have been hard to keep it from melting completely. 
 
Once out of the oven I drizzled a bit more olive oil over the top and then grated a little Parmesan over it for good measure.  What a great summer lunch!


Swedish Pancake Breakfast

11-Sep-2006


Sunday morning found M and me inside the Swedish Cultural Center on the east side of Queen Anne.  Thursday night at the Flickr Brews and Views meetup, a friend had mentioned that the first Sunday of every month* the center hosted a pancake breakfast with "real" Swedish pancakes.  Since he is a Swedish expat, I figured he knew what he was talking about!
 
At the entrance to the facility was a doorman/greeter dressed in traditional clothing.  Luckily for him the morning was not too warm as I’m sure it could have been pretty uncomfortable standing there in the sun in full gear!  He welcomed us and we proceeded inside to buy our tickets.
 
The cost of the breakfast is just $7 for adults, less for children, and for your money you get two trips through the breakfast line.  To facilitate this they give you two color-coded tickets – one for your first pass and one for your refill – and actually have two different lines inside.  This prevents those who are just getting refills from having to go out and get back in line with all the newcomers.  It’s a great idea! 
 
As you make your way through the line cheery volunteers load your plate with three pancakes, a nice slice of ham and either lingonberries or strawberries and whip cream.  On the next table you can pick up a little glass of orange juice, and there may have been milk there, too. 
 
Once at your table more volunteers bring you coffee (the site says "real Swedish coffee") or will direct you to a table where you can select from a variety of teas and fill a little pot with hot water.  While eating you are entertained by a band and any guests who feel like taking a spin around the dance floor! 
 
If you haven’t had Swedish pancakes before, you are missing a real treat.  They are sort of a cross between a traditional American pancake and a French crepe; thin and flexible yet with more heft to them than a crepe.  The traditional topping of lingonberries is wonderful!  Lingonberries are a sweet-tart berry with a beautiful deep color. 


Our first plate was tasty and more than filling – I did see a few people going back for their seconds but I’m not sure how they did it! 
 
This is a fun and tasty event and I highly recommend it as something a bit different and interesting to do.  For more details you can check the site – the calendar is a bit out of date but all the info on the breakfast can be found here
 
* The breakfast is held the first Sunday of the month except that they take a break in the summer and in September it’s the second Sunday so they don’t compete with Labor Day weekend.  If that is all too confusing you may just want to call them to verify the date you’d like to drop by! 
 
 
Swedish Cultural Center
1920 Dexter Ave N
Seattle
206.283.1090
 

Apple Manhattan

09-Sep-2006


With Labor Day behind us, the days getting shorter and that little tang in the air even on sunny days, our thoughts turn to fall.  Fall always brings to mind apples – even if I do have an early ripening variety!  This week for my Happy Hour at Home column over on The Spirit World I decided to focus on them. 
 
The cocktail for this week is yummy!  It would really be good if sipped while sitting next to a cozy fire!  And it looks like we may have an opportunity to build one soon!  
 
The recipe calls for calvados, which is a French apple brandy.  I used a beautiful apple brandy that I picked up at the St. George Spirits‘ tasting room when I visited the distillery in May.  It really added a nice apple tone to this cocktail. 

Apple Manhattan
  • 1 3/4 oz calvados
  • 1/2 oz sweet vermouth
  • 1/2 oz dry vermouth
  • Apple slice for garnish

Add all ingredients to a shaker filled with ice and stir gently with a barspoon. Strain into a chilled martini glass and garnish with the apple slice.

What Was I Thinking?

02-Sep-2006


I was at Costco a couple weeks ago and they were handing out samples as they often do.  I passed a table handing out samples of animal crackers and they were pretty good!  And what a bargain at, I think, $5 for a large container of them. 
 
Well, it didn’t really hit me just how large it was until I got it back to my house!  I have no idea what I was thinking!  If you look you can see that some of the cookies have been eaten – that’s the dent I’ve made in this behemoth over the last two weeks… 
 
They are pretty good.  And they are a nice little low-cal, low-fat snack with my mid-morning tea but still…. 
 
By the way, the wine bottle is in the photo just to give you some idea of scale.  I have not been serving the animal crackers with a glass of wine.  Although…

Agua Verde Paddle Club

01-Sep-2006


One of my favorite little places in town is the Agua Verde Paddle Club located at the end of Brooklyn Ave, on the UW campus, right on Portage Bay. Based on where it’s located you might think that it was a hidden gem.  It is a gem but it is so well known you are likely to encounter lines nearly everytime you come – especially during core hour meal hours. 
 
I often have lunch here but recently some friends and I decided to meet there for Happy Hour.  We arrived between 5:00 and 5:30 and it was already packed!  However, we managed to squeeze in and enjoy ourselves. 
 
During Happy Hour bottled beers are $2.50 and Margaritas are $4.50.  There’s a small selection of Happy Hour appetizers with the most expensive thing priced at $3.50. 
 
Our group mostly chose to go with the Mexican beer but one person had a Margarita and it looked great.  We also sampled a platter of nachos and the "Mangodilla", a quesadilla made with mangoes and chili.  Both were really good, and the Mangodilla was especially nice. 
 
If you are looking for a nice, casual place to enjoy a meal or just a beer or cocktail check out Agua Verde. 


Agua Verde Paddle Club
1303 NE Boat St.
Seattle
206.545.8570


Thai Beef

31-Aug-2006


With all those little Thai chilis coming into their own and my Thai Basil at its peak I’ve been trying to use as much of them both as possible.  Especially since one of my primary recipes is off limits this year.  With our exceptionally warm summer here in the Northwest, shellfish is pretty much banned for now – the warm water creates a bacteria that affects the little guys and so my normal consumption of Thai Mussels is non-existent this year.  But there are a million ways to use the ingredients and one of my favorites happens to be one of the easiest. 

Thai Beef

  • 1 to 1 1/2 pounds beef (I used a thick cut NY steak but flank steak is also a good choice), sliced thinly across the grain
  • 1 sweet onion chopped into large pieces
  • 2 to 3 cloves of garlic minced
  • 2 or more Thai Hots or 1 medium Thai Dragon Pepper
  • Black Vinegar (available at Asian Markets or Central Market here in Seattle but if you can’t find Black Vinegar you can substitute balsamic)
  • Handful of Thai Basil (can substitute Italian basil if you wish)
  • Olive oil
  • Salt and Pepper
  • Cooked rice
Sauté the onion in a little olive oil over medium high heat.  When it starts to get soft, add the garlic and Thai Hots.  Sauté until onion is just starting to turn golden.  Remove from pan and reserve. 
 
Add a bit more oil to the pan.  Add about 1/2 of the beef, making sure you don’t crowd it.  Sear it just 2 to 3 minutes on each side – you want it browned but not cooked all the way through.  Remove from the pan and reserve.  Repeat with remaining beef.
 
When the final batch of beef has been browned, leave it in the pan, and add back the reserved beef and onion mixture.  Add about 2 tablespoons of fish sauce and 2 tablespoons of black vinegar to the pan.  Roughly tear the Thai basil and add it to the pan.  Stir until all the beef and vegetables have been coated with the liquids.  Continue cooking until the basil is starting to wilt and the liquids have thickened slightly. 
 
Serve the beef over the cooked rice. 
 
For additional flavor, cook the rice in chicken stock and add a splash of black vinegar and fish stock to the pan. 
 

Thai Hots

31-Aug-2006

When I was selecting pepper plants this spring I couldn’t find one that I normally like to plant, Thai Dragon.  But there was a plant named Thai Hot, so I thought I’d give it a try.  Now, I have to admit that besides looking at the name of the plant I really didn’t read anything else on the little marker.  

When the plant started producing peppers I was very happy. I could see it was going to be loaded with peppers.  But then something seemed to go wrong.  They didn’t really grow like I was expecting.  They were, well stubby!  I was so disappointed as I love my Thai Dragons – a very hot pepper that is thin and about 4" to 6" long.  So I watched peppers continue to spring from the blossoms on this plant and then just sort of stop.  They started turning red a couple weeks ago.  And then it occurred to me that maybe I should read the little marker….  

Lo and behold these guys were doing just what they were supposed to do.  The description on the tag says, "Very hot.  1/2" upright pointing fruit.  Bright green fruit ripens to red."    Okay, so they are producing exactly as they were supposed to!  In fact I have some overachievers as many of them are a good 1" long! :-) That will teach me to read my tags a little better!  The tag also notes that this can be an ornamental plant, which I can see.  It would add a nice jolt of color to a border or pot.  Now that I know these guys are supposed to be stubby I just love them!

Happiness is a Bookshelf?

30-Aug-2006
 
There are days I really worry about myself.  There are some sort of silly things that make me really happy.  Most recently this has been a new (and very simple) bookshelf in my office.  But what makes me happiest about it, is that I now have one place for all my mixology and cookbooks!  And none of them are stacked on top of each other so that it’s a major construction project to get the one at the bottom out and then stack them all back up again! 
 
This was a more involved project than might be apparent from the description.  And in some ways I’m not quite done.  You can see a bit of a shelf in the photo – well there was another one of those that ran directly behind where this bookshelf now stands.  And the most challenging part is that those shelves on the wall hold part of my shot glass collection.
 
So the beginning of the project required me to find a place to temporarily store the shot glasses; take them down (and dust them!); take the shelf down; spackle and paint to cover the nail holes and then finally get around to removing the smaller bookcase that had been there; assembling the new one; and moving all the books to their new home. 
 
A while ago I whittled down my cookbook collection but then it grew just a bit again.  The good news is that it has been holding steady for several months and that everything fits on this shelf with one small exception.  So what you see here is 99 cookbooks; 19 mixology books; and assorted pamphlets, holiday magazines and combination user manual/cookbooks from various small appliances.  The only thing missing from this shelf are the four Culinaria books that I keep in my living room as they are not so much cookbooks (although they are filled with recipes) as travel guides, history books, cookbooks and coffee table books all rolled into gorgeous volumes divided by country. 
 
And it just works out that the size of the shelves works well for organizing the books, too.  On the very top shelf we have the mixology books (being held up by two boxed sets of cookbooks).  The next shelf down holds books devoted to appetizers, parties and entertaining.  This is followed by cookbooks that focus on a certain ethnic region.  The next shelf holds what I’ll call "general purpose" cookbooks – those that pretty much cover all courses from soup to nuts.  The bottom shelf holds all the titles related to desserts, baking and gift giving.  
 
It’s just such a pleasure to be able to see everything, have it all organized and be able to pick out any single volume that might catch my attention.  (sigh of happiness…)

Rose Red

30-Aug-2006

I know we’ve probably talked enough about applesauce for this year.  But I just wanted to share this photo with you.  I recently made a second batch of applesauce from my red gravenstein apples.  Since it was later in the season the skins were deeper colored than when I made the earlier batch.  In fact, in some cases, the skin color was bleeding into the flesh of the apple.  The pigmentation was super strong which led to this nearly red version of applesauce!