Make Your Own: Butter

The last time I was making crème fraîche I started wondering why I’ve never used my leftover whip cream to make butter. It such an obvious thing to do but it hadn’t occured to me. Most people know if you whip heavy cream too long it will turn to butter but I haven’t made my own butter since I was in Brownie Scouts!
Though it seemed to be very easy at that time I thought I’d better check to make sure I wasn’t forgetting anything important. Good thing I did because I hadn’t known about the rinsing process – probably because we ate our butter as soon as it was made and rinsing isn’t important in that case.
The nice thing about this “recipe” or process is that you can use any amount of cream. You start just as you’d expect: put cream in a mixing bowl for a stand mixer and using a wire whip beat it. Start the mixer on low – just so you don’t cover your kitchen with cream – but as soon as the cream starts to thicken keep increasing the speed until you have it on high.

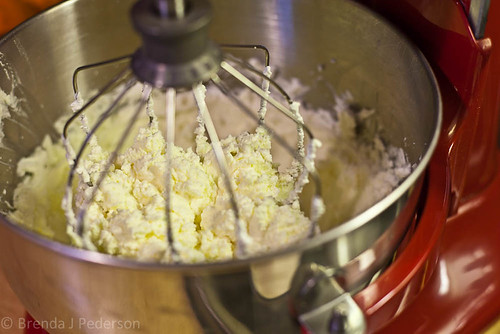
It took longer than expected for the cream to change color from off-white to pale-yellow and begin to look like creamed butter. It took about 20 minutes but I suspect this will vary depending on how much cream you start with and how quickly you get your mixer up to high-speed.
Once it turns to that pale yellow you are getting closer but not are not done yet.
Continue beating until the butter separates into solids and liquid. Watch carefully since you’ll need to reduce the mixer speed to keep the liquid, which is buttermilk, from slopping out of the bowl. The solids will look similar to cheese curds.
At this point you are ready to drain the butter solids from the buttermilk by pouring the mixture through a colander or strainer. You can keep the liquid and use it for something like pancakes or biscuits – and then use the butter on whatever you created!

Rinse the solids thoroughly until the water runs clear and then rinse them a little more. I thought my water was clear but in the next step I noticed there were still faint traces of solids in it. This will allow your butter to stay fresh longer.

Once the water runs clear, shake as much water off as possible. Then, using a spatula or your hands (I think hands are easier), mash the butter pieces together to squeeze out all remaining water and to start shaping your butter. I rolled mine into little balls as this helped me evenly divide it, but you can choose any shape or even just press it into a bowl or other container. Once I had all the butter into balls, I shaped the balls into small cubes and then wrapped the cubes in parchment paper for storage. When wrapping in the parchment I used it to tidy up the cubes a little more.

I chose to make unsalted butter so that I’d have more ways to use it but if you’d like to make salted butter – which will preserve it a little longer – add salt after you’ve rinsed and drained the butter. It will get worked into the butter as you press the curds together.
If you don’t have a stand mixer you can also do this using a hand mixer or I’ve read that a food processor or blender will work, too. No guarantees on that but it makes sense. With the food processor you’d probably need to watch for leakage – don’t fill the bowl too full. Or you can do what we did at my Brownie meeting: add cream to a jar, tighten the lid and shake, shake, shake!
Comments are closed.


Thanks for posting this – I’ve been wanting to make butter someday. I have a vivid memory of my 1st grade glass when we made butter by shaking jars of cream. We must have been shaking for a long time!
It must be the thing to do with first graders! In my case we had one jar that we passed round and round until it was butter but I remember it going around the table a couple of times. Looking back I think the troop leader/teacher was kind of brave to tackle the project.
I’m just now whipping my cream after seeing “natural flavoring” on the back of my butter package – turns out the soy industry has crept into some of our butter! Thanks for the tutorial. Any thoughts on how long the butter keeps once made?
Happy Buttering!
Hi Mel!
I’m not sure how long butter will last and I’m guessing it has to do with how fresh the cream was to begin with. I will tell you that the batch I made for this post is now one month old and it’s still fine. And my cream was just a few days from the pull date.
It’s so easy to make that I’d just make small batches, eat it up, and make a little more! ;-)