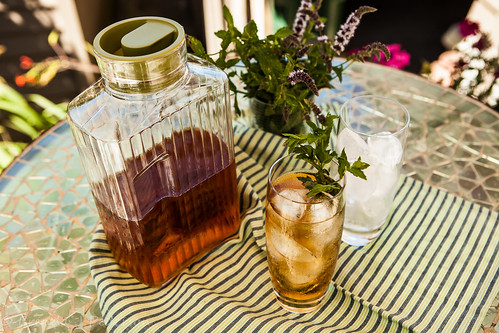
Mint Sun Tea
This year I’m bringing back a summer staple that somehow dropped from my repertoire – Sun Tea. A few weeks ago a friend posted a photo of produce from her garden and sitting behind the produce, a batch of tea brewing in the sun. The wheels in my brain started turning….. how long had it been since I’d made a batch? Last year? I don’t think so. The year before? Maybe. I’m not sure how long it’s been but now that I’m thinking about it, it’s time to bring it back.
The basic premise is that you place either tea bags or loose tea in a clear container filled with water. You set the container in the sun to let it “brew”. On a hot day this helps reduce the amount of heat in your house, since you aren’t heating up a stove to boil water. Speaking of boiling water…. I have never had an issue with sun tea but because the water does not reach boiling point it is possible for bacteria to develop. The CDC (Center for Disease Control) wrote a summary about bacteria in tea almost 20 years ago. You can read the report here. (pdf)
I use the 2 quart container you see pictured in the photo and, depending on the type of tea, submerge three to five teabags in the water. Then I let it sit in a sunny location for three or four hours. If you want stronger tea or would like it to brew faster, use more teabags. Remember that when you drink the tea, you’ll likely serve it over ice which will dilute it, so brew the tea stronger than you would for hot tea.
This year, I’ve made a lot of mint tea. I have tons of mint in my garden so I’ll snip three or four 8″ pieces and add those to the container, along with a black tea, like English Breakfast. Once the tea is brewed, remove the bags and the mint, if you added it. Then, to really bring out the mint flavor, I add about 1/4 cup of mint flavored simple syrup (recipe below). If you like a sweet tea, you may want to add more than 1/4 cup.
To finish, store your container in the refrigerator and it will be ready when you’re jonesin’ for a cool drink on a hot day. Just fill a glass with ice and then fill with your tea.
Mint Simple Syrup
Basic simple syrup is 1 cup water and 1 cup granulated sugar combined and then brought to a boil for about 2 minutes. You want to make sure the sugar is completely dissolved.
To make mint simple syrup, stir together the sugar and water and then add as many mint leaves as you can, keeping them submerged in the sugar mixture. Boil for 2 minutes, as with plain simple syrup. Then remove from the heat and allow to cool to room temperature. Once cooled pour the mixture through a sieve to remove all the mint leaves. Place in a covered container and chill until you need it.
Hazelnut Poppy Seed Cookies
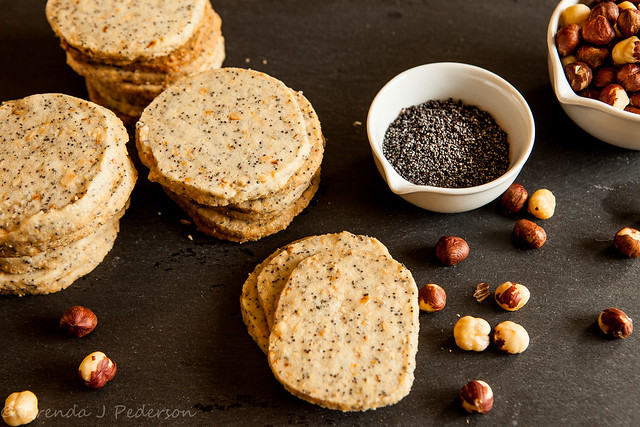
Here’s another winning recipe from The Grand Central Baking Book. This truly has become one of my go to books, especially for cookies. The instructions are clear, the recipes well-tested and the results delicious! This was my first time making this recipe and it definitely won’t be the last. I’m having a hard time keeping myself from eating them all at once! The nutty flavors of poppy and roasted hazelnuts enhance the rich and buttery shortbread style cookies. I made one change to the recipe. Based on the instructions it seemed the hazelnuts are left whole and mixed in. I find that whole nuts can sometimes make it hard to slice rolled cookies. I tossed the hazelnuts into a food processor to chop them up a little, leaving some good size pieces. Also, I have a heavy-duty mixer and it had no problem mixing the nuts into the batter.
Hazelnut Poppy Seed Cookies
Adapted from The Grand Central Baking Book…
- 3 cups plus 3 tablespoons (1 pound) all-purpose flour
- 1/4 cup (1.25 ounces) poppy seeds
- 1 teaspoon salt
- 1 1/2 cups (12 ounces, or 3 sticks) unsalted butter, at room temperature
- 1 cup (7 ounces) granulated sugar
- 2 teaspoons vanilla extract
- 1 cup (4 ounces) hazelnuts, lightly toasted and skinned (see below)
Measure the flour, poppy seeds, and salt into a bowl and whisk to combine. Using a stand mixer with the paddle attachment, beat the butter and sugar together on medium speed until very smooth, about 3 minutes. Add the vanilla, then reduce the mixer speed to low. Add the dry ingredients and mix just until they disappear into the dough. Fold in the hazelnuts with a sturdy spatula. Shape the dough into two logs 2 inches in diameter, then chill for at least 2 hours and up to 3 days (or freeze for up to 3 months). Preheat the oven to 325°F. Line two baking sheets with parchment paper or Silpat baking sheets. Slice the cookies 1/4 to 1/2-inch thick and place them about 1 inch apart, in 3 by 4 rows, on the prepared pans. Bake for 15 to 20 minutes, rotating the pans halfway through the baking time. The cookies should be firm to the touch.
To toast hazelnuts, preheat the oven to 275°F. Place shelled nuts on a baking sheet in a single layer. Toast for 20 to 30 minutes, until the skins crack and the nuts begin to turn golden brown. Remove from the oven and place the nuts in a kitchen towel. Wrap tightly and let sit for 5 minutes or so. (You’re letting them steam a little bit.) Then rub the nuts (still in the towel) vigorously to loosen the skins. You may not be able to remove every little piece of skin, but that’s okay. Remove the nuts from the towel.
Wine Tasting & Blending at EFESTĒ Winery

EFESTĒ (pronounced like the letters, F-S-T) is one of the Washington wineries with a tasting room in the Woodinville warehouse district. The tasting room sits behind a couple of warehouses and up a long driveway off of 144th. It is warm and welcoming with large windows bringing light into the large space. There’s a stand-up bar, as well as, a variety of chairs and tables providing plenty of options and space for tasting.
But the tasting room was not my destination on this visit. EFESTĒ is trying out a new sort of tasting they plan to offer soon. A few of us assembled in the tank room for a combined vertical/barrel tasting. This tasting focused on Big Papa, EFESTĒ’s 100% Cabernet Sauvignon wine. The tasting was led by Peter Devison (scroll down, then select his name under Our Team), EFESTĒ’s winemaker. While we tasted, Peter, a great speaker and storyteller, talked to us about what we were tasting; where he thought the wine was, in terms of drinkability; the characteristics; and other winery and wine making tidbits.
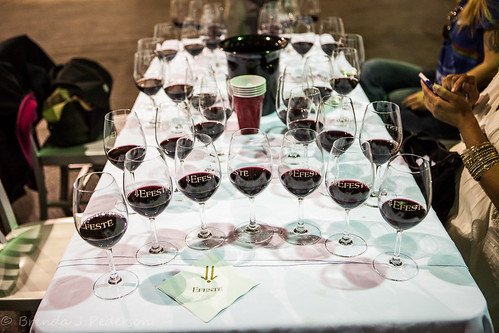
First we started with bottled wines to set the baseline. Our first wine was the Big Papa 2008, a big, bold wine with tons of structure, rich black currant flavor, and strong tannin. This wine demands a big, meaty steak to pair with it and will easily handle a few more years in bottle before reaching its peak. Next we tasted the 2011. This wine was only bottled a year ago and is still in process of coming together. It had a much fresher taste than the 2008, tannin was barely detectable, and I did not find it nearly as complex as the 2008. Peter does not believe it will age as long, either. We then moved on to the 2012, which had only been bottled last week. Tasting wine at this stage is a little bit unfair to the wine, as it hasn’t recovered from the shock from bottling. Having said that, this is a nice wine that will only get better as it settles down. A lot of fruit, but also more structure than the 2011. It will be interesting to see how it ends up comparing to the 2008.
Then we moved on to the fun part. Our next four wines were barrel samples that could be used to create the 2013 Big Papa. While they were all Cabernet Sauvignon, each of the samples was from a different vineyard and/or AVA. Each had its own set of characteristics that it would bring to a finished wine. I find the process of selecting and blending wines fascinating. Although it parallels cooking in many ways, I can’t seem to get my head around what elements in one wine will complement (or not…) elements in another wine. Although I’m sure much of that comes from experience, this is the skill that makes a great winemaker.
We tasted and talked about the four samples, individually, and then tried our hand at creating our own blend. While I didn’t create anything worth writing home about, I loved the process of experimenting to see what I could come up with.
EFESTĒ plans to offer this event again on July 11th. Wine Club members and those on their mailing list will get first notice. The events will be limited to small groups so, if you are interested, sign-up for their newsletter! You can also follow them on Facebook or Twitter, but event notifications go to Wine Club and newsletter subscribers first.


Tzatziki and Pita
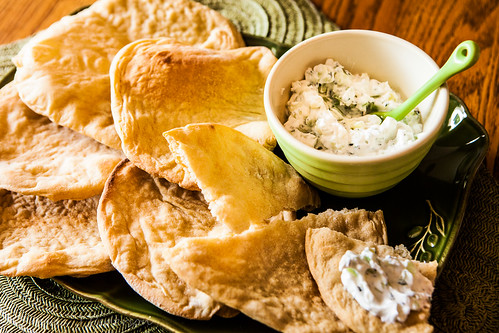
A favorite summertime snack – or sometimes it becomes a meal – is Tzatziki and pita. Cool, crisp refreshing, cucumber is always delicious, but especially so on a warm, sunny day.
I don’t always follow a specific recipe but generally start with something like this version from Ina Garten. I may vary it depending on my mood or ingredients on hand. One major difference is that I always use Greek yogurt and it really doesn’t need draining.
I made the pita you see in the photo and while they don’t look too bad, let’s just say I wouldn’t serve them to company. So I won’t share that recipe today but may have one for you in the future. In the meantime, good pita is easy to find in any grocery store.
Tzatziki
from Ina Garten
- 1 pound (1 pint) plain yogurt (whole milk or low-fat)
- 1 hothouse cucumber, unpeeled and seeded
- 1 tablespoon plus 1/2 teaspoon kosher salt
- 1/2 cup sour cream
- 1 tablespoon Champagne vinegar or white wine vinegar
- 2 tablespoons freshly squeezed lemon juice (1 lemon)
- 1 tablespoon good olive oil
- 1 1/2 teaspoons minced garlic
- 1 1/2 teaspoons minced fresh dill
- Pinch freshly ground black pepper
Place the yogurt in a cheesecloth or paper towel-lined sieve and set it over a bowl. Grate the cucumber and toss it with 1 tablespoon of kosher salt; place it in another sieve, and set it over another bowl. Place both bowls in the refrigerator for 3 to 4 hours so the yogurt and cucumber can drain.
Transfer the thickened yogurt to a large bowl. Squeeze as much liquid from the cucumber as you can and add the cucumber to the yogurt. Mix in the sour cream, vinegar, lemon juice, olive oil, garlic, dill, 1/2 teaspoon salt, and pepper. You can serve it immediately, but I prefer to allow the tzatziki to sit in the refrigerator for a few hours for the flavors to blend. Serve chilled or at room temperature.
Steamed Mussels in Thai Basil Coconut Broth
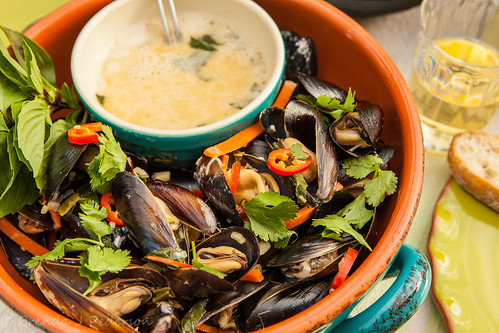
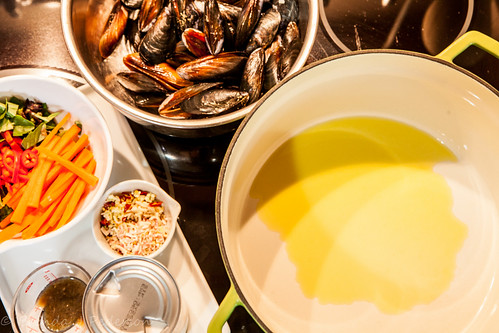
This is one of my favorite mussel recipes. It comes together very quickly. I don’t always assemble mise en place when I cook, but for this recipe you should have all the chopping and measuring done before you start. Feel free to substitute ingredients or increase/decrease the amounts.
This makes a great starter or main course. As a main allow at least a pound of mussels for every two people, more is advisable. As with many mussel recipes the broth is delicious, so make sure you have crusty, country bread available to soak it up.
The recipe specifies individual plating but I generally serve the mussels family-style. To make it easier to get to the broth I use a slotted spoon to place the mussels in the serving bowl and then pour the broth into a small side bowl so that everyone can spoon as much as they want over their mussels.
Steamed Mussels in Thai Basil Coconut Broth
adapted from Dishing with Kathy Casey: Food, Fun, and Cocktails from Seattle’s Culinary Diva
- 2 tsp. vegetable oil
- 1 Tbsp. minced ginger
- 2 tsp. minced garlic
- ¼ tsp dried red pepper flakes
- 1 Tbsp. minced fresh lemongrass (Optional) – I added this
- 13.5 oz can of unsweetened coconut milk
- 2 tsp. Thai fish sauce (nam pla)
- 2 tsp. soy sauce
- 3 Tbsp. coarsely chopped fresh Thai Basil
- 1 Tbsp. fresh lime juice
- 2 pounds fresh mussels, washed and debearded
- ½ cup matchstick cut carrots
- ½ cup matchstick cut red bell pepper
- ¼ cup slivered green onion
- Salt and pepper, to taste
- 1 Tbsp. chopped fresh cilantro
In a large soup pot or Dutch oven, heat the oil over medium heat until hot. Add the ginger, garlic, red pepper flakes and lemongrass and cook, stirring often, for about 30 seconds; do not let the mixture burn.
Add the coconut milk, fish and soy sauce, Thai Basil, lime juice, carrots, red peppers, and green onions. Stir for about one minute and bring to boil.
Add the mussels and bring back to a boil. Cover immediately. Steam the mussels covered for 3 to 5 minutes – or until mussels open. Immediately remove from heat and with slotted spoon divide the mussels (discard any not open) and vegetables between 4 bowls. Taste the broth and add salt or pepper, if needed. Pour the broth over the mussels. Sprinkle with cilantro and serve immediately.
White wines like Dry Riesling or Pinot Gris go well with this dish as they help cut the heat from the pepper flakes.
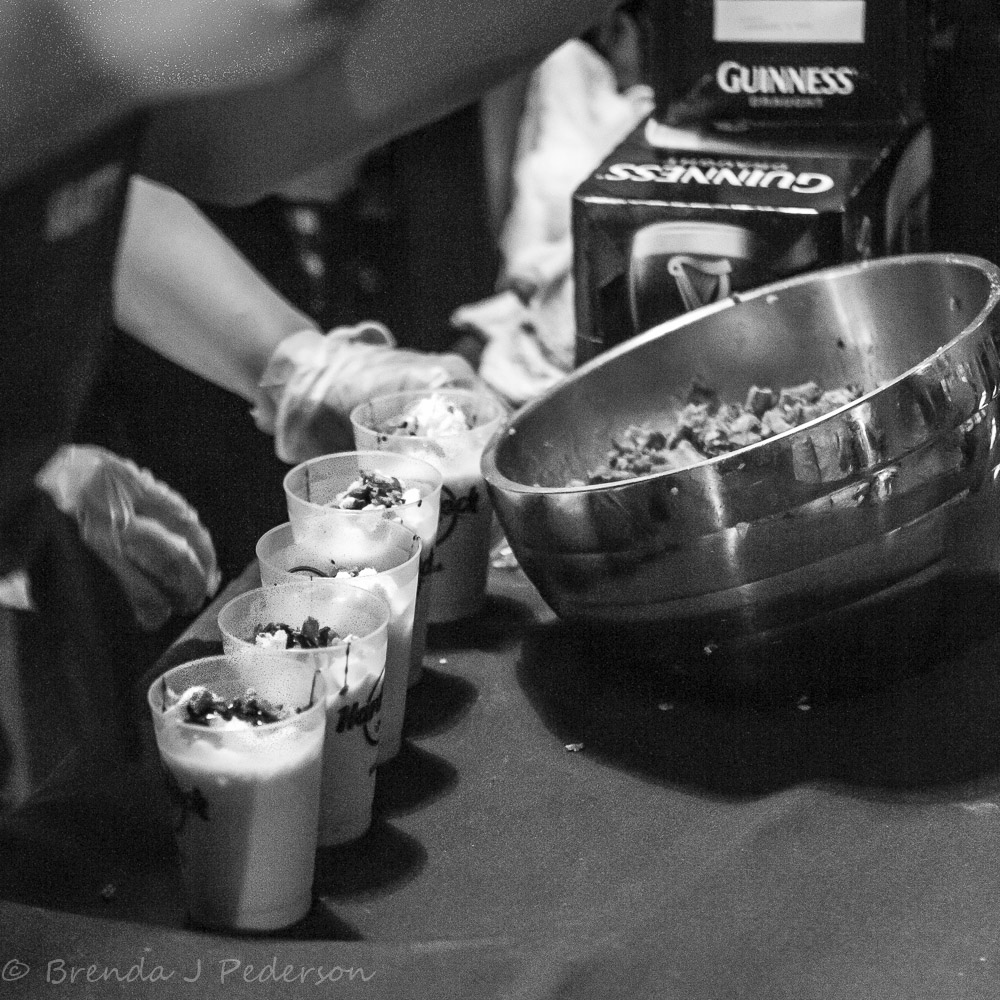
Scenes from the Beer and Bacon Classic
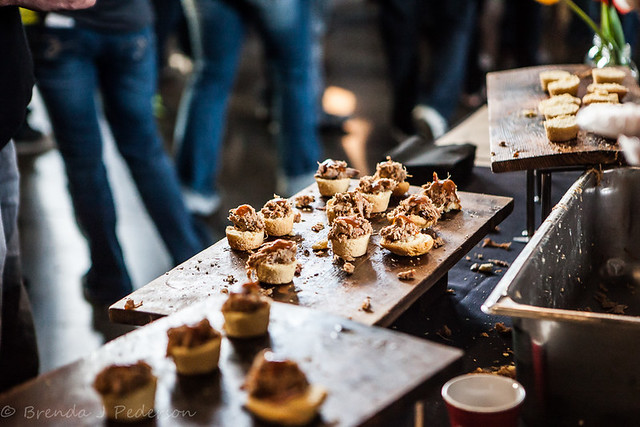
I was invited to attend the first Bacon and Beer Classic held at SAFECO Field on Saturday night. Generally speaking, I have a little bit of trepidation about attending large, first-time, events since it just seems to take a trial or two until the organizers can pull together an event that really works. However, the words “Bacon and Beer” seduced me, and I sent in my “yes” RSVP.

These guys did a lot of things right: booths were nicely spread around the perimeter in small groups; there were things to do besides just eating and drinking from ongoing musical entertainment to a whole section of grown-up sized games; the number of tastes and bites allotted was a generous, 25 of each, and there was no messing with buying extra tickets; the spaces between the vendor groupings were great for taking a moment to enjoy whatever you were drinking/munching and if you wanted to sit for a few minutes there was plenty of seating! Also, the small, porcelain, red “Solo” cups were cute and clever.

A couple of things that could be improved for next year: please do not schedule this event on the same night as a soccer match or a football game, as far as that goes; some participants ran out of food, which is always disappointing. This event had both an afternoon and evening session and, it appeared, some of the vendors did not open at all for the second session, while several others closed down about an hour into the four-hour evening event.

I can tell that summer is approaching – weekends are starting to be packed with interesting events, many outdoors. Here’s a few to check out this weekend.
Beer and Bacon Classic
First up, a new event, the Beer and Bacon Classic at SAFECO Field on May 17th. There are two sessions to choose from: 12:00 pm – 4:00 pm or 6:00 pm – 10 pm. You must be 21 to attend.
There are more than 40 participating breweries and I’m guessing that many of them will be serving more than one beer – talk about options! There are also more than 40 participating food vendors and what I like about this lineup is there are several restaurants that you don’t normally see at this sort of event. With all of them serving something related to bacon – well, there’s a winning combination!
Tickets are available here but before you buy check around for discounts. I noticed Groupon has a special, as does Amazon Local (probably Living Social, too) and some of the vendors have codes you can use for discounts. Here’s an example.
KCTS Cooks
Also on Saturday a new version of this popular program airs. From the PR release:
KCTS 9 viewers demonstrate their home-cooked best recipes live on KCTS 9 Cooks: Every Day on May 17 at 11:00 am. Our newest viewer cooking special features the kind of mouth-watering, go-to favorites that have been tested and tasted by real cooks in family kitchens.
In addition to the live event with home cooks, there will be a few local restaurateurs demonstrating great sounding dishes:
- Chef John Howie, Sport, Seattle | Texas-Style Steak Chili (Award winning!)
- Chef Meeru Dhalwala, Shanik, Seattle | Marinated Pork Tenderloin with Spinach in Coconut Curry and Quinoa & Cauliflower Salad
- Chef Tom Douglas, Tom Douglas Restaurants, Seattle | Cornbread Pudding
University District Street Fair
While technically not strictly a culinary event, we all know that one of the best things about street fairs is that category of food found only at certain events like street fairs: roasted corn, dripping with butter; elephant ears covered with cinnamon sugar; and all kinds of twists on ethnic food – some more pseudo than traditional. There’s one area dedicated to food trucks. Big Time Brewery will host a beer garden, too.
On Saturday, once you’ve had your fill of street food you can always head a little north to the University District Farmers’ Market and pick up something a little more healthy to counter whatever damage you did at the street fair.
The street fair is both Saturday and Sunday, May 17th and 18th. For full details check the site.
Seattle Restaurant Development Forum
I’m not sure if this would appeal to any of you but just in case…..
Wednesday, March 19th there’s an event being held at The Triple Door covering the business of restaurants. Here’s the short and sweet description from the ticketing site:
Seattle Restaurant Development: Join Bisnow and some of the most innovative restaurateurs in the Seattle area for an inside look into the restaurant development scene. Learn about the hottest neighborhoods for up and coming and well established restaurants alike, and hear the real estate perspective on the growth of Seattle as a veritable restaurant hub.
Additional information from the PR person:
It will be about the the trends, challenges, and opportunities in Seattle’s restaurant world today—and how restaurants are helping create the physical landscape and culture of neighborhoods.
What’s most interesting, I think, is the list of presenting chefs/restaurateurs Tom Douglas, Renee Erickson, Thierry Rautereau, Rick Yoder, Ethan Stowell and Matt Dillon. Also presenting are real estate, architecture and other business professionals. Apparently they plan to pack a lot in during the 90 minutes of presentation!
Anyway, if you are interested I have a discount code you can use. The ticket site is here and the discount code is #SEAfoodie, which will give you 33% off the $64 ticket.
Time to Make Corned Beef

A couple of years ago I made corned beef from scratch for the first time. The process is super easy and the results are delicious.
There are two potential challenges with this recipe: it may take you time to track down pink salt – this is a preserving salt not just a pink colored salt like Himalayan salt; and pickling (corning) the beef takes about five days – which isn’t really a challenge unless your refrigerator is already packed to the gills. Finding space for the container might be hard but this recipe is definitely worth it.
I wrote a post with all the details the first time I made it. If you get started now you’ll have plenty of time and you’ll be rewarded with your own scrumptious corned beef on St. Patrick’s Day!
Espresso Granita

Apparently this is my winter of making lighter, frozen confections – first the tangerine sorbet and now this espresso/coffee granita! A nice thing about granita is that you don’t need special equipment to make it, so anyone can enjoy this icy delight. It does, however, take a little time as you break up the ice crystals throughout the freezing process.
You can make this recipe with either espresso or strong coffee. I used a combination because I wanted the richness of espresso but the ease of making a pot of coffee. And I chose decaf beans so I wouldn’t mess up anyone’s sleep when I served it as the finale of a recent dinner.
It’s traditional to top this granita with whip cream but you could also use a shot of a favorite liqueur (think Bailey’s, Frangelico or Kahlua) or even just cream straight from the carton.
You’ll need space in your freezer where a 9″x13″ pan can lay flat, but there’s no special equipment required for granita.
Espresso Granita
based on a recipe from The Perfect Scoop
Makes about 2 quarts
- 1 cup of freshly brewed espresso
- 3 cups of freshly brewed very strong coffee (I used 2-3 times the normal coffee amount)
- 1 1/2 cups sugar
Mix all ingredients together while the coffee and espresso are still warm. Stir until the sugar is well dissolved. Cool the mixture to room temperature or cooler.
Pour the mixture into a 9″x13″ pan and place it in the freezer. (Alternatively, it may be easier to put the pan in the freezer and then pour the mix, to avoid sloshing.)
Freeze for 1 hour, then take a fork and break up any ice crystals that have formed around the edges of the pan. Drag them towards the center of the pan. The mixture will still be almost all liquid so be careful if you need to remove the pan from the freezer to break up the crystals.
From this point on, every 30 minutes rake the mixture with a fork, breaking up the crystals and pulling them to the center of the pan. It will take a few hours for the mixture to completely freeze.


